Welcome to the Zoom H6 Operation Manual, your comprehensive guide to unlocking the full potential of this powerful handheld recorder․ This manual provides detailed instructions, setup guidance, and troubleshooting tips to help you master the H6’s features and functions․ Whether you’re recording audio professionally or for personal projects, this manual ensures you get the most out of your device․
Available in PDF and ePub formats, the manual covers everything from basic operations to advanced recording techniques․ It’s essential for both newcomers and experienced users seeking to optimize their recording experience․
1․1 Overview of the Zoom H6 Recorder
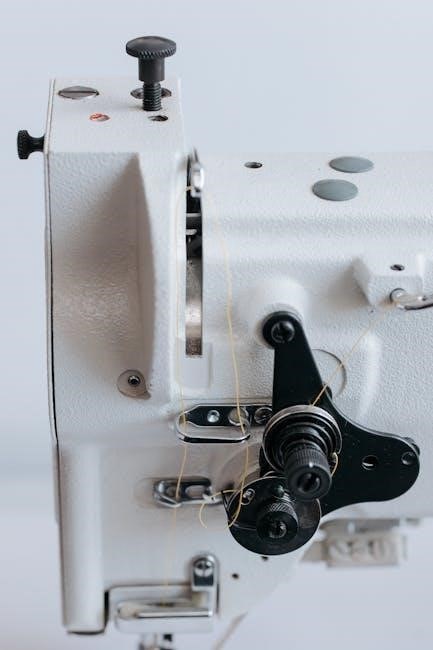
The Zoom H6 is a portable, 6-track digital recorder designed for high-quality audio capture․ It supports 24-bit/96kHz recording, interchangeable microphone capsules, and a touchscreen interface․ Built for versatility, it serves as a USB audio interface and is ideal for film, music, and podcasting applications․ Its durability and advanced features make it a professional-grade tool for diverse recording needs․
1․2 Key Features and Specifications
The Zoom H6 features 6-track recording, 24-bit/96kHz resolution, and interchangeable X/Y or MS microphone capsules․ It offers 4 XLR/TRS combo inputs, phantom power, and a built-in mixer with effects․ The H6 also functions as a USB audio interface, supporting 2-in/2-out or 6-in/2-out configurations․ With SD card storage and a color touchscreen, it combines portability with professional-grade functionality for versatile recording needs․
1․3 Quick Start Guide
Power on the H6, then select your desired recording mode․ Connect microphones or use the built-in capsule․ Set input levels using the gain knobs․ Press the record button to start, and stop when done․ Use the color touchscreen to navigate settings․ Record, play back, and organize files effortlessly with this intuitive guide to get started quickly and efficiently with your Zoom H6․

Recording Modes on the Zoom H6
The Zoom H6 offers versatile recording modes, including stereo, multi-track, voice memo, and overdub, catering to various audio needs and ensuring high-quality capture in every scenario․
2․1 Stereo Recording Mode
Equipped with XY condenser microphones, the Zoom H6’s Stereo Recording Mode delivers immersive audio․ The microphones can be angled between 90 and 120 degrees, optimizing sound capture for live performances, interviews, and field recordings․ With up to 96 kHz/24-bit resolution, it ensures high-quality recordings․ External microphones can also be connected, adding flexibility for diverse audio needs, perfect for professionals and enthusiasts alike․
2․2 Multi-Track Recording Mode
The Zoom H6’s Multi-Track Recording Mode allows capturing up to six tracks simultaneously․ Each track can be controlled independently, enabling precise volume adjustments and panning․ This mode is ideal for live concerts, podcasts, and overdubbing․ The H6 supports both 2-input/2-output and 6-input/2-output USB audio interface setups, making it versatile for multi-track recording sessions, whether in studio or on location, ensuring professional-grade results every time․
2․3 Voice Memo Mode
Voice Memo Mode on the Zoom H6 is designed for quick and easy voice recording․ It allows for voice-activated recording, automatically starting when sound is detected and stopping during silence․ This mode is ideal for interviews, lectures, or capturing quick notes․ Files are organized by date and time, making it easy to locate and manage your recordings efficiently, ensuring high-quality audio capture every time․
2․4 Overdub Mode
Overdub Mode on the Zoom H6 enables users to layer audio recordings over existing tracks․ This feature is perfect for adding vocals, instruments, or sound effects to pre-recorded material․ It plays back the original track while allowing you to record a new one, creating a seamless blend․ Ideal for building complex soundscapes, Overdub Mode offers flexibility and creativity in your recording process․

Connectivity and Audio Interface
The Zoom H6 offers versatile connectivity options, serving as a USB audio interface with multi-track recording capabilities․ It connects seamlessly with external mics and is compatible with both Mac and PC․
3․1 Using the Zoom H6 as a USB Audio Interface
The Zoom H6 can function as a USB audio interface, enabling high-quality recording directly to your computer․ Connect via USB, choose between 2-in/2-out or 6-in/2-out configurations, and record stereo or multi-track audio seamlessly․ This feature makes the H6 ideal for both studio and field recording, enhancing your audio production workflow with flexibility and precision․
3․2 Connecting External Microphones
The Zoom H6 supports connecting external microphones via its XLR/TRS combo inputs, accommodating dynamic, condenser, and shotgun mics․ For condenser mics, enable phantom power (48V) via the menu․ Insert the XLR into the input jack, adjust input levels, and use the low-cut filter to reduce noise․ This ensures high-quality audio capture for various recording scenarios․
- Connect mics to XLR/TRS inputs․
- Enable phantom power if needed․
- Adjust input levels for optimal sound․
- Use low-cut filter to minimize noise․
Refer to the manual for detailed steps․
3․3 Audio Interface Setup for Multi-Track Recording
To set up the Zoom H6 as a USB audio interface for multi-track recording, connect it to your computer via USB․ Select USB mode in the H6 menu and choose between 2-in/2-out or 6-in/2-out configurations․ Use the H6essential software to configure input settings, enabling multi-track recording in your DAW․ This setup allows simultaneous capture of up to six tracks, perfect for professional audio production․
- Connect H6 to computer via USB․
- Select USB mode in the menu․
- Choose 2-in/2-out or 6-in/2-out․
- Configure inputs in H6essential software․
Navigation and Control
The Zoom H6 features an intuitive menu navigation system and transport controls for easy operation․ Use the joystick and buttons to navigate menus and control recording, playback, and editing functions seamlessly․
4․1 Menu Navigation System
The Zoom H6’s menu navigation system is designed for simplicity and efficiency․ Use the joystick to scroll through options and SELECT to confirm choices․ Navigate through settings like recording modes, input levels, and playback options with ease․ The clear hierarchical structure ensures quick access to essential functions, making it user-friendly for both beginners and professionals․ Customization options allow you to tailor the menu to your workflow preferences․
4․2 Transport Controls and Button Functions
The Zoom H6 features intuitive transport controls for seamless recording and playback․ The REC button starts and stops recording, while the PLAY/PAUSE and STOP buttons control audio playback․ The JOYSTICK navigates menu options, and the MARK button adds markers for easy track organization․ Dedicated buttons for REW and FF enable quick audio scrubbing, ensuring precise control over your recordings․

Firmware and Software Updates
Regular firmware updates enhance the H6’s functionality, while H6 Essential software and compatible applications ensure optimal performance and compatibility with your recording setup․
5․1 Updating Firmware to the Latest Version
To update the Zoom H6 firmware, visit the official Zoom website and download the latest version․ Connect the H6 to your computer via USB, then use the H6 Essential software to select the firmware file․ Follow the on-screen instructions to complete the update, ensuring all functions remain optimized and compatible with your recording needs․
5․2 Installing H6 Essential Software
Download the H6 Essential software from the Zoom website․ Install the program on your computer and restart it․ Connect the H6 to your computer via USB, then select USB mode in the device settings․ The software will recognize the H6, allowing you to manage firmware updates, audio interfaces, and other advanced features seamlessly․
5․3 Compatible Application Software
The Zoom H6 is compatible with various DAWs, including Ableton Live, Logic Pro, and Pro Tools, ensuring seamless integration for professional recording․ It functions as a USB audio interface, allowing direct recording into these applications with high-quality sound․ The H6 Essential software enhances compatibility and provides essential tools for managing firmware updates and optimizing performance․

Troubleshooting Common Issues
Resolve common issues like no sound output, error messages, or connectivity problems․ This section provides solutions and guidance to restore functionality and ensure optimal performance․
6․1 No Sound Output on Windows PC
If experiencing no sound output on a Windows PC, ensure the H6 is properly connected via USB․ Restart the device, reinstall drivers, and check PC audio settings․ Verify the H6 is selected as the input device in sound preferences․ Consult the manual for detailed troubleshooting steps to resolve connectivity issues and restore audio functionality․
6․2 Error Messages and Solutions
Common error messages on the Zoom H6 include “No Sound Output” or “Device Not Recognized․” To resolve these, restart the H6, ensure proper USB connection, and update firmware․ For persistent issues, reset to factory settings or reinstall drivers․ Consult the manual for detailed solutions and troubleshooting guides to address specific error codes effectively․
6․3 Restoring Factory Settings
To restore the Zoom H6 to its factory settings, navigate to the menu, select “System,” and choose “Factory Reset․” Confirm the action to reset all settings to default․ Note that this will erase all custom settings and marked files․ Ensure backups are made before proceeding․ This step is useful for resolving persistent issues or preparing the device for transfer to a new user․

Safety Precautions
Handle the Zoom H6 with care to avoid damage․ Use compatible power sources and ensure voltage matches your region․ Store in a dry, cool place, away from direct sunlight and moisture to maintain optimal performance and longevity․
7․1 Power Sources and Voltage Compatibility
Use only compatible AC adapters and batteries to power the Zoom H6․ Ensure the power source matches your region’s voltage rating (100-240V AC, 50/60Hz)․ Incorrect voltage may damage the device․ Always consult a Zoom-authorized retailer when using the H6 in foreign regions to confirm compatibility and safety standards․
7․2 Handling and Storage Guidelines
Handle the Zoom H6 with care to avoid damage․ Use a protective case when transporting․ Avoid exposure to extreme temperatures, humidity, or direct sunlight․ Store in a dry, cool place with silica gel packets to prevent moisture damage․ Clean only with a soft, dry cloth; avoid harsh chemicals or liquids․
Store batteries separately and avoid prolonged power-on states․ Always power off before storage to conserve battery life and maintain optimal performance․ Follow these guidelines to ensure longevity and reliability of your recorder․

Accessories and Compatible Peripherals
Explore a range of accessories designed to enhance your Zoom H6 experience, including compatible microphones, SDHC/SDXC memory cards, and optional peripherals for expanded functionality and convenience․
Use high-quality SDHC/SDXC cards for reliable recording and storage․ Optional accessories like USB adapters and protective cases ensure optimal performance and protection for your device․
8․1 Recommended Microphones for the H6
The Zoom H6 supports a variety of microphones to enhance recording quality․ Recommended options include the XYH-6 and MSH-6, designed specifically for the H6, offering high-quality sound and durability․ These mics are optimized for capturing clear audio in different environments, ensuring professional-grade results․ For expanded versatility, third-party microphones with compatible connectors can also be used, providing flexibility for specialized recording needs․
Always ensure compatibility with the H6’s input specifications for optimal performance and sound quality․
8․2 Compatible SDHC/SDXC Memory Cards
The Zoom H6 supports SDHC and SDXC memory cards with capacities up to 128GB․ For optimal performance, use Class 10 or higher cards․ The H6 is compatible with UHS-I cards, ensuring fast data transfer and reliable recording․ Always verify card compatibility with Zoom’s official list to avoid recording interruptions․ Refer to the H6 Operation Manual for the latest updates on supported memory cards․
Using high-quality, compatible cards ensures stable and efficient recording sessions․
8․3 Optional Accessories for Enhanced Use
Enhance your Zoom H6 experience with optional accessories like the BTA-1 Bluetooth adapter for wireless connectivity․ Use high-quality external microphones, such as the XYH-6 or EXH-6, for expanded recording capabilities․ Additional peripherals like protective cases, windshields, and tripod stands ensure durability and convenience․ These accessories help tailor the H6 to your specific recording needs for professional-grade results․
Explore Zoom’s official accessory list for more options to customize your setup․

Downloading the Operation Manual
The Zoom H6 Operation Manual is available for download from the official Zoom website in PDF and ePub formats․ Visit www․zoom․jp/docs/h6 to access guides, ensuring you have the latest instructions for optimal use․
9․1 Accessing PDF and ePub Formats
The Zoom H6 Operation Manual is available in both PDF and ePub formats for easy access․ Visit the official Zoom website at www․zoom․jp/docs/h6 to download the files․ PDFs are ideal for desktop viewing, while ePub formats are compatible with eReaders and mobile devices․ Ensure you have a PDF reader installed to open and view the manual seamlessly․
9․2 Language Options and Translation Availability
The Zoom H6 Operation Manual is primarily available in English, but translations in other languages like French, Italian, and Russian can be accessed․ Visit the official Zoom website for language-specific versions or check local distributors for translated manuals․ Ensure compatibility with your device and operating system for optimal viewing and understanding․
9․3 Official Sources for Manual Download
The Zoom H6 Operation Manual is officially available for download from Zoom’s website at www․zoom․jp/docs/h6․ This page offers the manual in PDF and ePub formats․ Additionally, authorized distributors and the Zoom support page provide direct links to the manual․ Always ensure you download from trusted sources to avoid unauthorized versions․

Warranty and Customer Support
The Zoom H6 warranty program ensures device protection and reliability․ For inquiries, contact Zoom Support via their official website or regional authorized service centers for assistance․
10․1 Warranty Registration and Coverage
Register your Zoom H6 within 30 days of purchase to activate the warranty․ Coverage includes repairs for manufacturing defects for one year․ Extended coverage options are available․ Visit the official Zoom website for registration and detailed terms․ Ensure to retain your purchase receipt for warranty claims and support requests․
10․2 Contacting Zoom Support for Assistance
For assistance, visit the official Zoom website and navigate to the support page․ Contact options include email, phone, or live chat․ Have your product serial number and a detailed issue description ready for faster resolution․ The support team is available to address technical queries, warranty claims, and provide troubleshooting guidance for your Zoom H6 recorder․