Welcome to the Singer Serger Manual guide! This manual is your key to unlocking the full potential of your Singer serger. Discover how to understand its components, adjust settings, and maintain its performance. Learn troubleshooting tips and master serging with confidence.

What is a Serger and Why Do You Need One?
A serger, or overlocker, is a specialized sewing machine that trims fabric edges and encases them with thread, creating a professional finish. Unlike traditional sewing machines, sergers use loopers and multiple threads to securely wrap fabric edges, preventing fraying. This makes them essential for sewing enthusiasts and professionals alike, offering durability and a polished look for garments, home decor, and more. A serger is a must-have for anyone seeking high-quality, efficient sewing results.
Overview of the Singer Serger Models
Singer offers a variety of serger models catering to different sewing needs. From the vintage Singer 746 to the modern Singer 14U285B, these machines are known for their durability and versatility. The Singer 14J334 and 3342 models are popular for their heavy-duty metal frames and ease of use. The Singer Elite SE017 stands out with advanced features, while older models like the Singer 301 and Featherweight 221 are sought after by collectors. Each model provides unique benefits, making Singer sergers a reliable choice for hobbyists and professionals alike.
Importance of Reading the Manual Before Use
Reading the Singer Serger manual is essential to understand your machine’s unique features and functions. It provides critical guidance on proper threading, tension settings, and maintenance. By following the manual, you can ensure safe operation, prevent damage, and achieve professional results. The manual also helps troubleshoot common issues like thread breakage or uneven stitching. Familiarizing yourself with the manual maximizes your serger’s potential and enhances your sewing experience. Don’t skip this step to avoid costly mistakes and ensure longevity for your Singer Serger.
Key Features and Benefits of the Singer Serger
The Singer Serger offers advanced features like adjustable stitch length, heavy-duty metal frames, and easy threading systems. These benefits ensure durability, versatility, and professional-quality stitching for all projects.
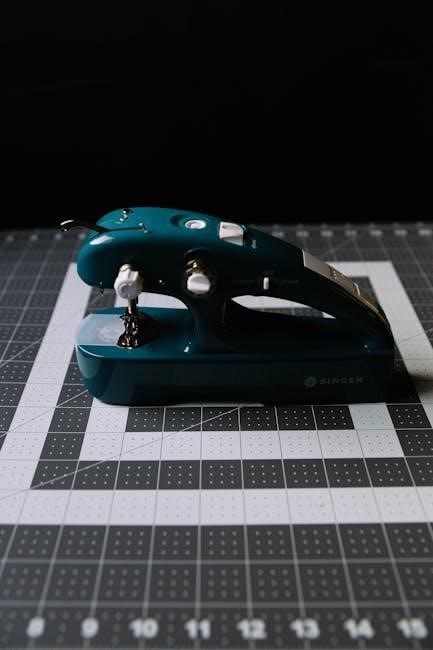
Understanding the Machine Components
The Singer Serger consists of key components like tension discs, loopers, and a cutting blade. The tension discs control thread tightness, while loopers wrap threads around fabric edges. The cutting blade trims fabric seams, and the pressure foot holds fabric steady. Adjusting the stitch length and width ensures customizable stitching. Familiarizing yourself with these parts is essential for proper operation and achieving professional results in your sewing projects.
Adjustable Stitch Length and Width
Your Singer Serger allows you to adjust the stitch length and width, enabling precise control over your serging projects. Use the stitch length dial to set the distance between stitches, ensuring the perfect seam for various fabrics. The stitch width adjustment lets you customize how tight or loose the stitching is, providing flexibility for different materials and desired finishes. This feature ensures professional-looking results, whether you’re working with delicate fabrics or heavy-duty textiles.
Heavy-Duty Metal Frame for Durability
The Singer Serger features a robust heavy-duty metal frame, designed to withstand the rigors of frequent use. This durable construction ensures stability and reduces vibration, allowing for smoother operation. Unlike plastic-based models, the metal frame provides long-lasting resilience, making it a reliable choice for both home and professional sewing projects. With this solid foundation, your Singer Serger delivers consistent performance and durability, ensuring years of dependable service.
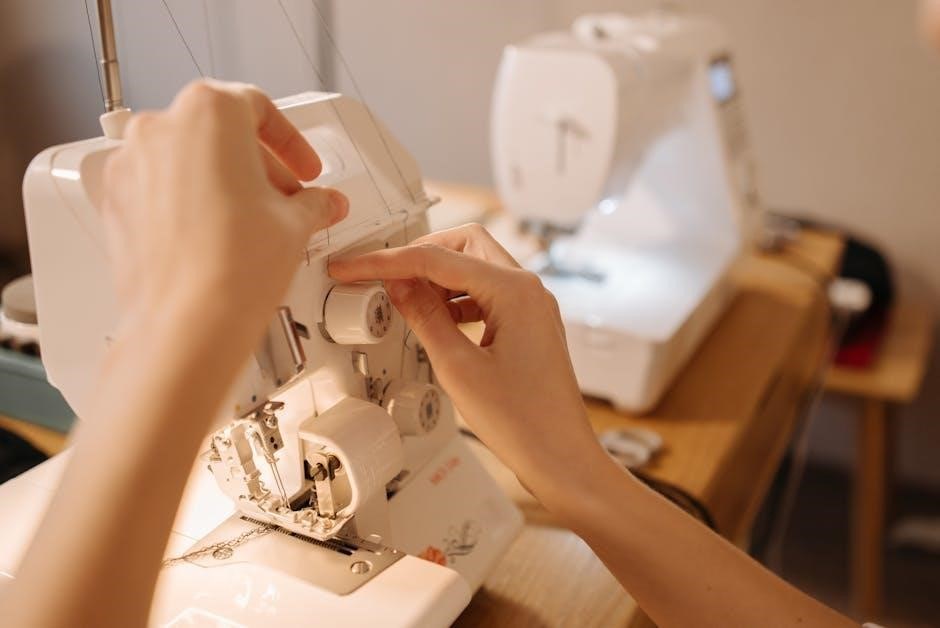
Threading and Tensioning Your Singer Serger
Threading and tensioning are crucial for smooth serger operation. Properly guide threads through tension discs and test stitches. Consult your manual for specific steps and troubleshooting tips.
Step-by-Step Guide to Re-Thread Your Serger
Re-threading your Singer Serger involves several precise steps to ensure proper function. Start with the presser foot up to engage tension discs. Insert threads through spool pins, then guide them through tension discs and thread guides. Next, thread the upper looper from left to right, followed by the lower looper. Pull gently to remove slack and lower the presser foot to set tension; Test stitches on scrap fabric to ensure even sewing and proper blade function. If issues arise, consult the manual for troubleshooting specific to your model.
How to Properly Set Tension Discs
Properly setting the tension discs on your Singer Serger is crucial for balanced stitching. Begin by turning off the machine and raising the presser foot to engage the discs. Gently pull the threads to ensure they pass through the discs smoothly. Adjust the tension knobs while sewing a test fabric scrap to achieve even thread flow. If the stitches are too tight or loose, fine-tune the discs until the desired tension is achieved. Always refer to your manual for specific model adjustments.
Common Threading Mistakes to Avoid
Avoid common threading errors to ensure smooth serging. One mistake is threading in the wrong order, which can cause uneven stitches. Always follow the manual’s threading sequence. Another error is using the wrong type or weight of thread, leading to poor tension or breakage. Never skip the tension discs, as this disrupts thread flow. Additionally, neglecting to cut excess thread tails can interfere with stitching. Lastly, avoid over-tightening, as it may damage the machine or threads. Proper threading ensures reliable performance and professional results.

Maintenance and Troubleshooting
Regular cleaning, proper oiling, and timely blade replacements ensure optimal performance. Always use quality threads and avoid harsh chemicals. Address issues promptly to prevent damage and extend lifespan.

Regular Cleaning and Oiling Tips
Regular maintenance ensures your Singer serger runs smoothly. Turn off the machine, remove debris with a soft brush, and use compressed air for tight spaces. Oil moving parts as recommended in the manual to prevent rust and friction. Clean tension discs with a lint brush to ensure proper thread flow. For stubborn buildup, lightly dampen a cloth but avoid harsh chemicals. Always use high-quality sewing machine oil and refer to your manual for specific guidance. Regular care extends the life and performance of your serger.
Fixing Common Issues Like Thread Breakage
Thread breakage is a common issue with sergers, often caused by misaligned threads or improper tension. To fix this, re-thread your machine following the manual’s guide, ensuring threads sit correctly in tension discs. Check for knots or tangles in the thread and use high-quality serger thread. If breakage persists, adjust tension discs or consult the manual for specific settings. Regularly cleaning lint and debris from the machine can also prevent thread breakage. Always refer to your Singer serger manual for troubleshooting specific to your model.
How to Replace the Cutting Blade
To replace the cutting blade on your Singer serger, begin by ensuring the machine is turned off and unplugged for safety. Locate the blade, typically situated near the bottom of the serger. Remove any covers or screws to access it. Once accessible, carefully remove the old blade, taking note of its sharpness. Install the new blade by aligning it properly, ensuring it is securely fastened with the provided screw. After installation, test the blade with scrap fabric to ensure it cuts cleanly and adjust if necessary. Always refer to your Singer serger manual for specific instructions tailored to your model.

Accessories and Supplies for Your Singer Serger
Essential threads, needles, and optional feet enhance your serging experience. Always use genuine Singer parts for optimal performance and durability. Find these supplies on Singer’s official website or authorized retailers.

Essential Threads and Needles for Serging
Using the right threads and needles is crucial for optimal serging results. Sergers typically use 2-4 threads, depending on the model, and require specialized serger needles. Choose high-quality threads designed for overlocking to ensure smooth stitching. For heavy-duty Singer sergers, consider thicker threads for durability. Always match needle sizes to your fabric type to prevent breakage. Genuine Singer parts are recommended for consistency and performance. Regularly replace needles and inspect threads to maintain your serger’s efficiency and extend its lifespan.
Optional Feet and Attachments
Expand your serging capabilities with optional feet and attachments designed for specific tasks. A rolled hem foot is ideal for creating professional-looking hems, while a blind hem foot helps sew invisible hems. Gathering feet simplify creating ruffles or elastic edges. Additional attachments like a piping foot or beading foot can enhance decorative projects. These accessories are available for various Singer serger models and can be purchased from Singer’s official website or authorized dealers. They offer versatility for diverse sewing needs, making your serger even more indispensable for complex or specialized projects.
Where to Find Genuine Singer Parts
Genuine Singer serger parts can be found through Singer’s official website, ensuring authenticity and compatibility. Authorized Singer retailers and sewing machine dealers also carry a range of parts. Online marketplaces like Amazon may offer genuine parts, but verify the seller to avoid counterfeits. Additionally, Singer’s customer support can assist in locating specific parts or directing you to authorized suppliers. For vintage models, communities and forums often share tips on sourcing rare or discontinued parts, helping you maintain your serger’s performance and longevity.
DIY Projects to Master Your Singer Serger
Start with simple DIY projects like table covers or fabric bags. Progress to home décor and clothing alterations. These projects enhance your serger skills creatively.

Simple Projects for Beginners
Start with easy DIY projects like table covers or fabric bags to get comfortable with your Singer serger. These simple tasks help you learn basic techniques such as threading, tension adjustment, and fabric handling. Begin with straight seams to practice even stitching and edge finishing. Use scrap fabric to test settings and build confidence. These introductory projects will help you master the fundamentals of serging, ensuring professional-looking results and preventing fabric fraying. They are perfect for understanding how your machine works before moving on to more complex creations.
Intermediate Sewing Ideas
Once comfortable with basic serging, try intermediate projects like adjusting hems or creating decorative edges on garments. Make reusable produce bags or custom napkins to practice working with various fabrics. Sewing small accessories, such as fabric belts or zipper pouches, helps refine your skills. These projects allow you to experiment with different thread colors and stitch settings while maintaining a professional finish. They are ideal for mastering techniques like seamless fabric joining and precise edge trimming, preparing you for more complex serging tasks.
Advanced Techniques to Try
For experienced users, explore advanced techniques like serging curved seams or working with delicate fabrics such as silk and lace. Learn to use differential feed for professional-looking results. Experiment with chain stitching and coverstitch options if your model supports them. Create intricate fabric manipulations or custom ruffles. These techniques challenge your skills and expand your creative possibilities. They are perfect for crafting high-end garments, home decor, or unique textiles, ensuring your serger is used to its full potential.
Mastering your Singer serger opens endless creative possibilities. With proper care and practice, you’ll achieve professional results. Happy sewing and enjoy your serging journey!
Final Tips for Getting the Most Out of Your Singer Serger
Regularly maintain your Singer serger by cleaning and oiling it to ensure smooth operation. Always use high-quality threads and needles suitable for your projects. Experiment with different settings to achieve desired results. Refer to the manual for model-specific guidance. Practice on scrap fabric before working on actual projects. Explore online resources and tutorials for advanced techniques. Join sewing communities for tips and inspiration. Keep your serger well-maintained, and it will serve you for years, helping you create professional-looking garments and home decor with ease.

Resources for Further Learning
For deeper understanding, explore Singer’s official website for manuals, tutorials, and stitch guides. Online classes on platforms like Michaels offer hands-on learning. Video tutorials on YouTube and sewing blogs provide visual guidance. Join sewing communities and forums for tips and troubleshooting. Check the Internet Archive for vintage manuals. Enroll in workshops or courses for advanced techniques. Utilize resources like manuals.singer.com for specific model guidance. These tools will enhance your serging skills and keep you updated on best practices and new techniques.